Sometimes a little project is all you need to make the season feel extra magical. This painted unicorn pumpkin is exactly that—an easy, cute, and colorful craft that turns an ordinary pumpkin into a sparkly pumpkin unicorn.

Table of Contents
Why We Love This Unicorn Craft
This pumpkin paint project is simple, fun, and ridiculously cute. You don’t need anything fancy — just paint, felt, yarn, and a pumpkin. Easy, affordable, and still centerpiece-worthy.
Materials

Small Pumpkin
Real, foam, or craft pumpkin. I used a real mini pumpkin and painted it white.
 with 12 Art Brushes, Art Supplies for Painting Canvas, Wood, Ceramic & Fabric, Rich Pigments Lasting Quality for Beginners, Students & Professional Artist")
Acrylic Paint
White, black, pink, and gold
, Fast Preheating Hot Melt, High Temp for School Crafts DIY Arts and Quick Home Repairs, 20W Blue")
Hot Glue + Glue Sticks

Paint Brushes and Sponge Brush


Air Dry Clay
White or golden yellow for the unicorn horn.

Gold Fine Glitter
")
Yarn
Mix of pink, teal and metallic colors, or a multi-colored yarn.
Optional Shortcut
")
If you don’t want to make the horn or paint the eyes, Amazon has unicorn cake toppers that come with a gold horn, unicorn ears, and eye stickers.
Just be sure to check the size of the toppers and measure your pumpkin so everything looks proportional.
Step by Step Instructions

- Paint the pumpkin white.
Start with a real pumpkin (like I did) or use a craft/foam pumpkin. Brush on two thin coats of white acrylic paint, letting each coat dry before adding the next.
If you happen to find a white pumpkin at the store, you can skip the painting step.
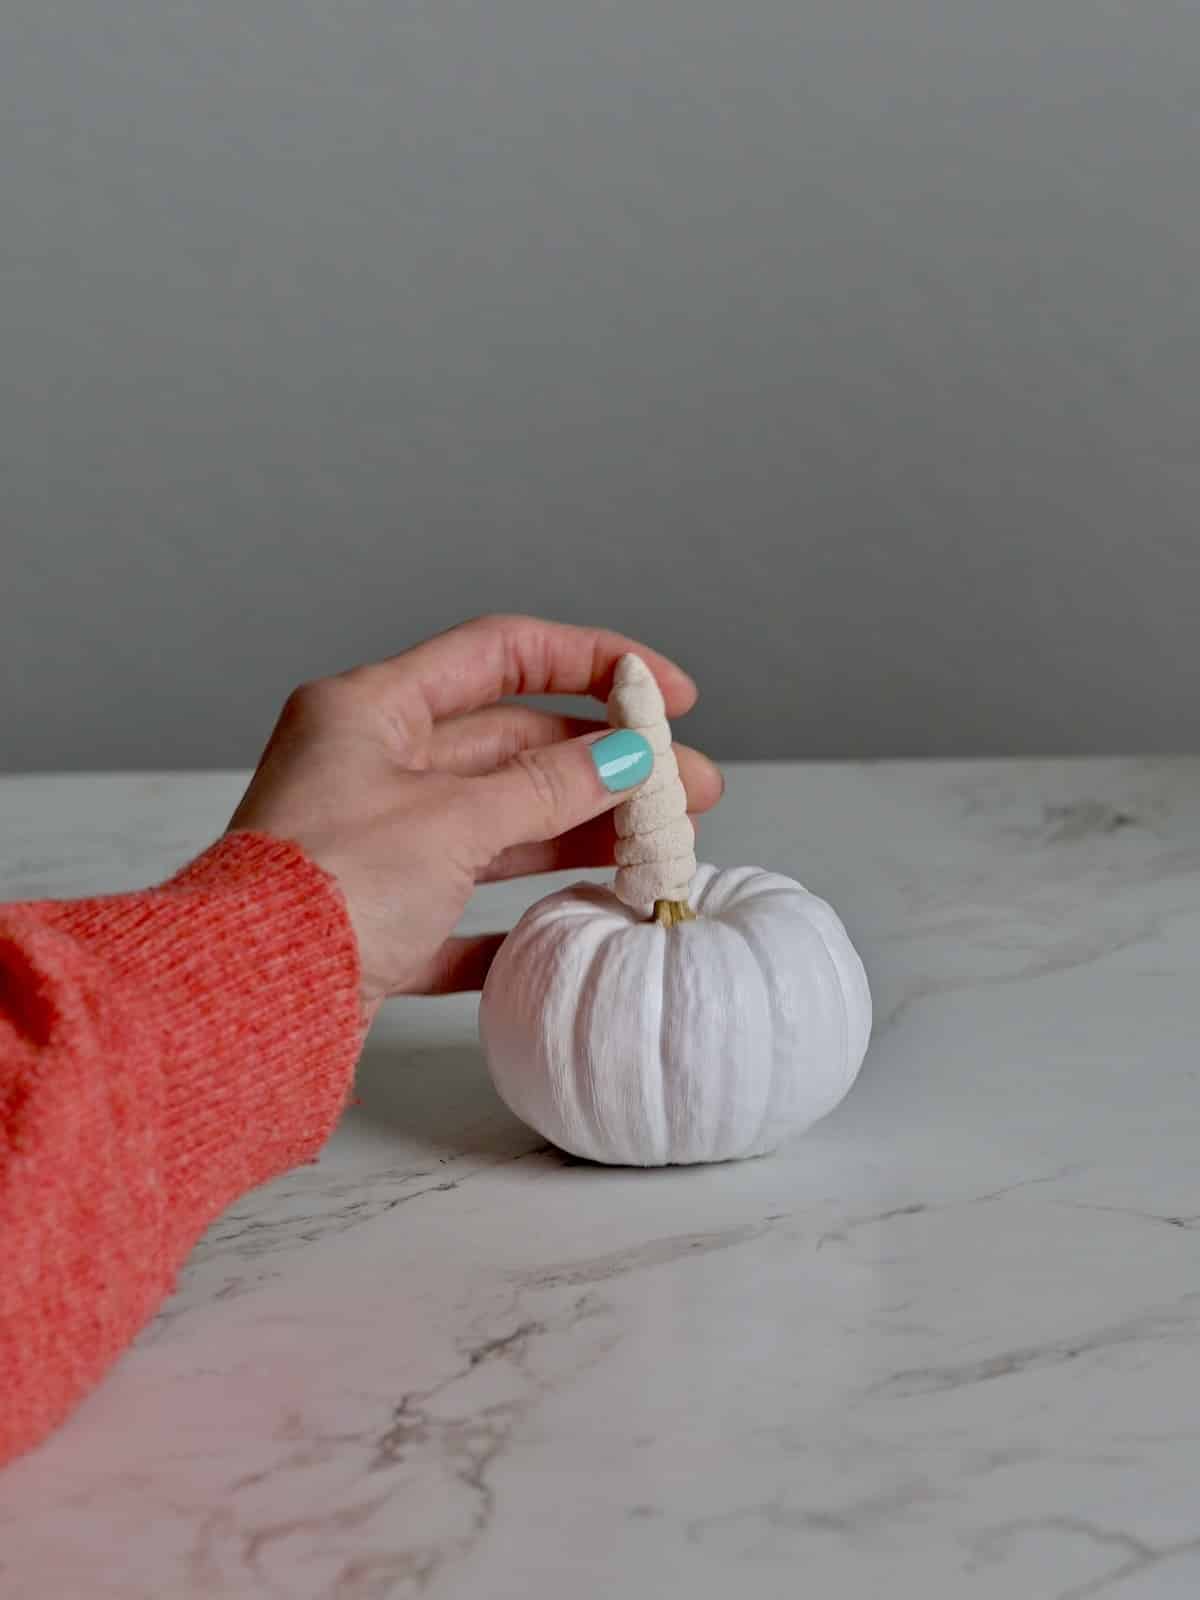
- Make the unicorn horn.
Roll a piece of air-dry clay into a cone shape, then gently twist it to form the spiral of a unicorn horn. press the clay onto the pumpkin stem to make a hold.
Let it dry completely according to package directions (usually overnight). For larger horns, hide a dowel underneath the clay for support.

- Paint the face.
Using a fine brush and black acrylic paint (or a black paint pen), paint two curved “sleepy” eyes.
Add small lines for lashes around the eyes. Allow to dry.
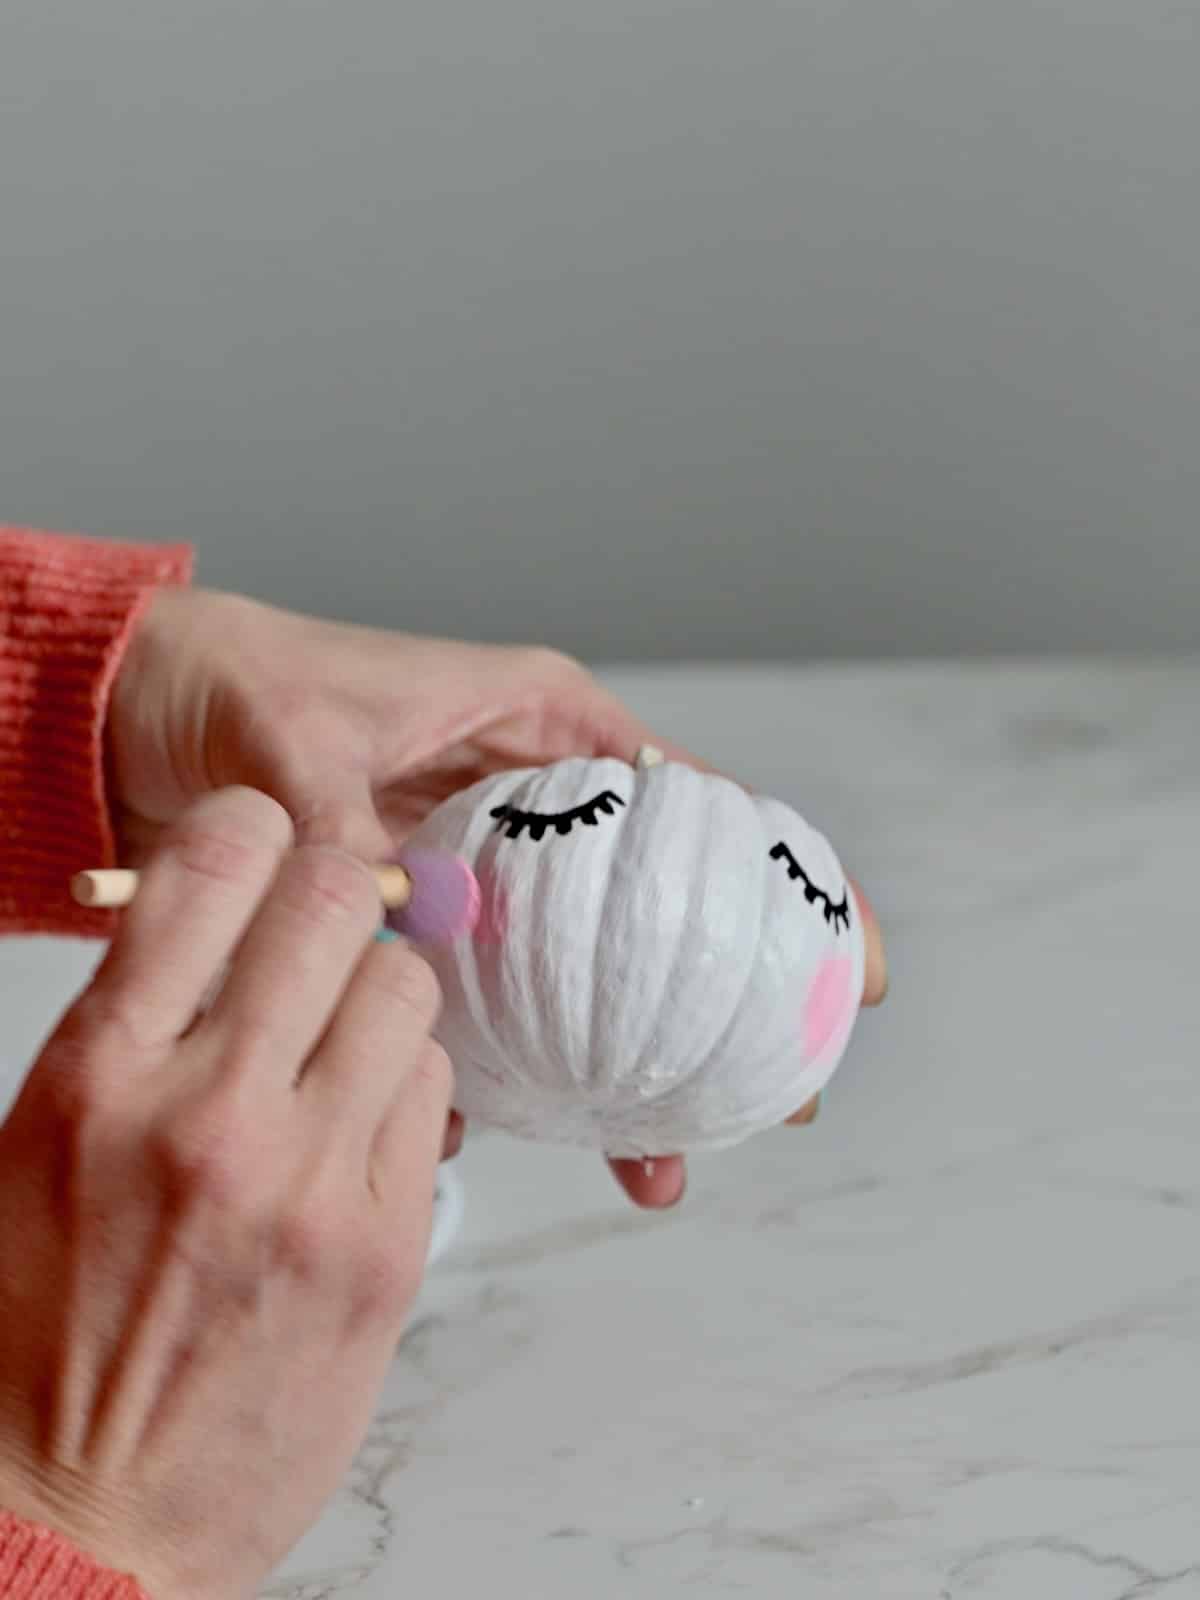
- Add rosy cheeks.
Dip a round sponge dauber into pink paint, then blot off the extra on a paper towel. Gently dab circles onto the cheeks for a soft blush.
Use the same technique to add pink inside the ears for a coordinated look.

- Cut and prepare the ears.
From white felt, cut two rounded triangles for ears. Paint the center pink with the same sponge brush.
Alternatively, glue on a smaller pink felt triangle to create the inner ear detail.

- Cut yarn for the mane.
Select a mix of yarn colors and textures, like pink, teal, gold, and metallic shades.
Cut strands in various lengths (about 6–10 inches each, depending on the size of your pumpkin) to give the mane fullness and texture.

- Paint + glitter the horn.
Once the clay horn is dry, paint it gold with acrylic paint and allow to dry.
Brush on a thin layer of glue on the gold horn and sprinkle gold glitter all over. Tap off the excess glitter and let the horn dry completely.

- Glue horn, ears, and mane.
Using hot glue, attach the horn to the center top of the unicorn pumpkin.
Place the felt ears just behind the horn. Then layer the yarn strands along one side and down the back of the pumpkin to create a colorful flowing mane.


- Make felt flowers.
Cut a ½ inch to 1 inch deep by 4-5 inch strip of felt. Cut half circles/ scallops along one long edge.


- Starting at one end, roll the scalloped felt strip tightly, adding dots of hot glue on the bottom side as you go to hold it together. This will form a little rosette.

- Add flowers and finish. Glue the felt flowers around the base of the horn and near the ears to give your unicorn a floral crown.
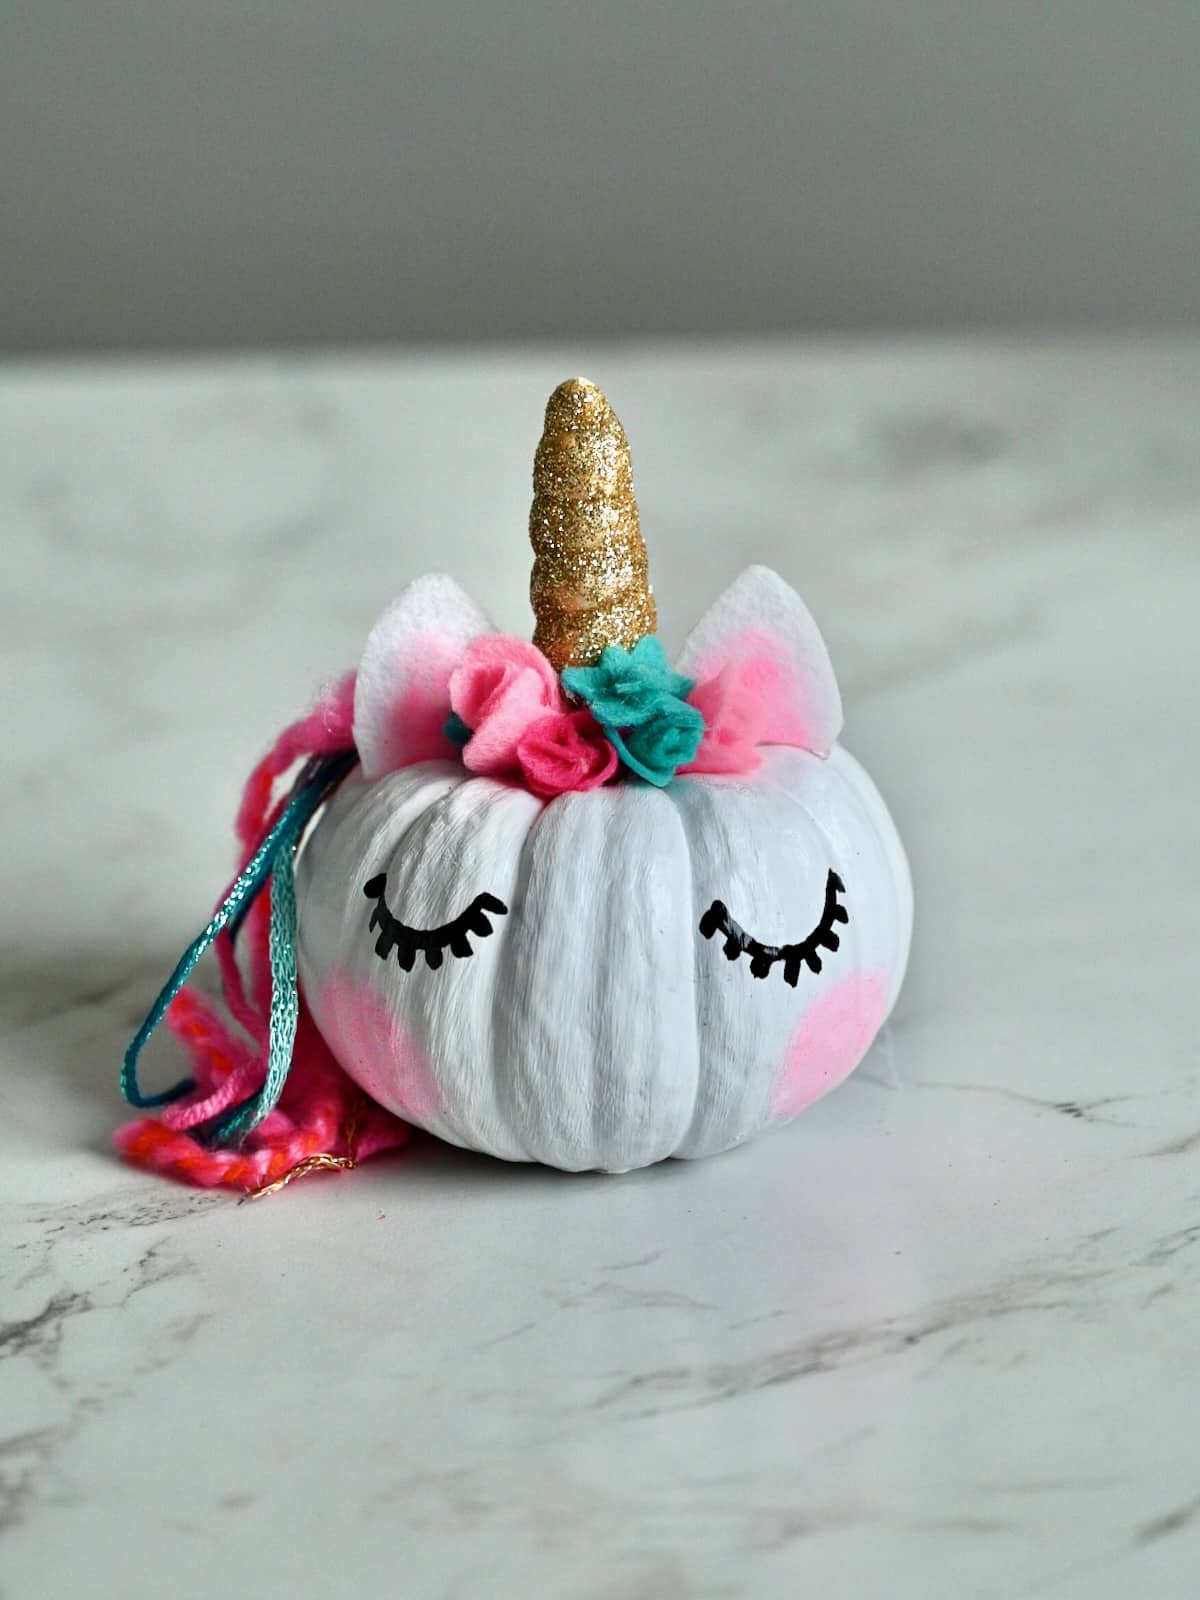
- Adjust the yarn mane, touch up any paint if needed, and let everything set before displaying your finished pumpkin unicorn.
Your painted unicorn pumpkin is now ready to sparkle on the front porch, in the classroom, or as a Halloween table centerpiece!
Video
Watch this video to see my pumpkin turn into a unicorn complete with glitter and flowers.
Top Tip
Pumpkin Options: I used a real mini pumpkin for this project, but foam pumpkins are a fun alternative if you want your unicorn to last for years (and they’re easier to paint).
Quick Version: Skip the DIY flowers and use pre-made felt flowers instead.
Kid-friendly option: If kids are helping, a black paint pen for the unicorn's eyes is less messy than paint + brush.
Classroom or Party Idea: Set up a unicorn pumpkin decorating station with pre-painted pumpkins and let kids add manes and stickers.
Whether you’re decorating for Halloween or just want to add something whimsical to your front porch, this DIY unicorn pumpkin will be your new favorite.
I hope you have as much fun making one as I did!


We'd love to hear from you